
![[Most Recent Quotes from www.kitco.com]](http://www.kitconet.com/images/sp_en_6.gif)


Counter Attack: Shooting Your Weapon From The Retention Position
BY EVE FLANIGAN MONDAY, SEPTEMBER 19, 2016
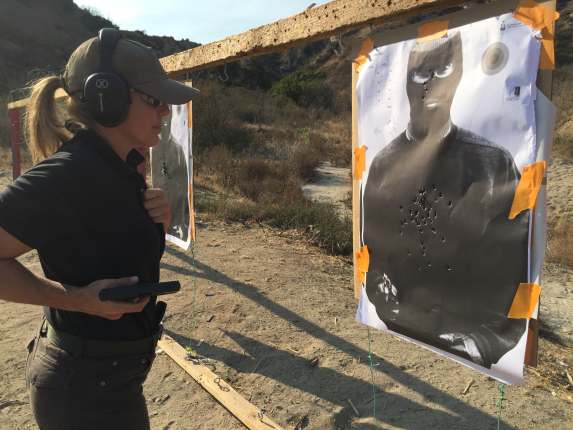
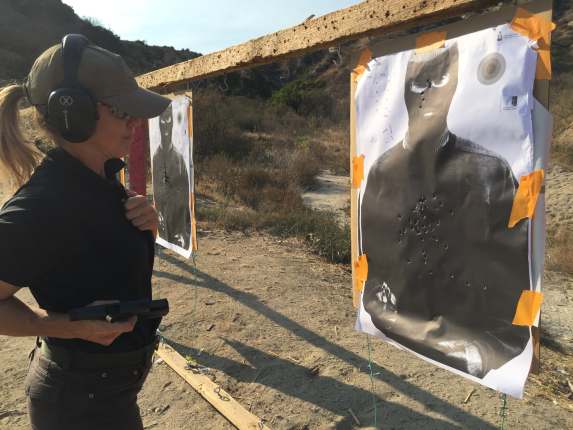
shooting from retention
Shooting from weapon retention position
About 55 percent of criminal attacks are said to happen at a distance of three yards or less. It makes sense, then, to learn shooting techniques that are suited for up-close-and-personal attacks.
The so-called weapon retention shooting position is taught as a counterattack at very close range. It’s also a method of deploying the gun where it’s harder for an assailant to steal.
Range practice using the retention position is a good way to prepare for the possibility of having to use it. The overview given here is very general. It is strongly suggested that you use this information as a basis for dry fire practice and only introduce live fire with the assistance of an instructor who is qualified to teach this technique.
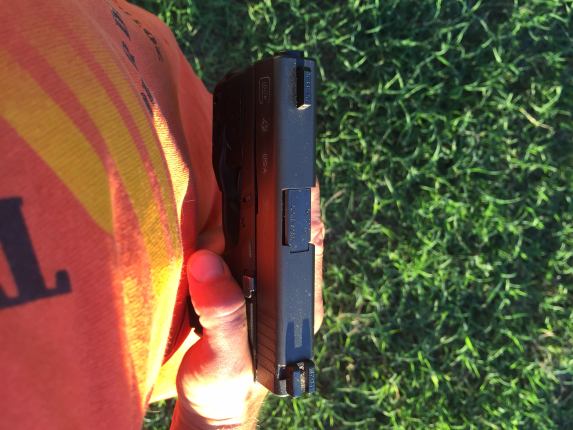
self-defense with retention
View from above. The firearm is next to my ribcage with the grip touching my side.
Key to this technique are acceptance and a consistent, nearly automatic use of two of the firearms safety rules, which I’ve covered in other articles:
Keep your finger OFF the trigger until the sights are on target and you’re ready to shoot.
Never allow the muzzle to cover anything you’re not willing to destroy.
If you’ve taken a shooting lesson in which the instructor told you to correct one of those things more than one time, do not attempt shooting from retention position. Make safety habitual, then come back to this lesson.
Slight head trick: the sights will be on target during this drill, but you won’t see them, since the gun will be at your side. This is one time when you get to focus on the target and not the front sight.
Do this drill with an unloaded handgun until you are sure the muzzle is not covering any part of your body at any time.
Setting up the drill
Since we’re practicing for self-defense, a realistic target is helpful. A life-size torso with “foul lines” marking the territory of a good shot is necessary to know if your shots are likely to be effective on a real threat.
Your gun should be holstered, or in your hands in the low ready position. Low ready means finger straight, muzzle pointing in front of you about where target would touch the ground if it reached that far. Your grip will be a full shooting grip, with the exception of your finger resting firmly on the frame.
Position yourself within three feet of the target. Arm’s length is a decent indicator. If practicing with a friend on the firing line, use the same agreed-upon distance. This is for muzzle safety.
shooting from retention
Setting my shooting distance
Prepare to draw or present the gun
Drawing from concealment is beyond the scope of this lesson. As with any new skill, don’t combine two exercises until you can do them both consistently well. For this lesson, you’re working from a rigid, outside-waistband holster on your strong side, or from the low ready position, with two hands on the gun, safety on if you have one, trigger finger rested on the frame.
Your non-shooting hand MUST get out of the way as you draw or present the gun from low ready. There are different schools of thought and methods on this. I prefer placing my non-shooting hand high on my chest and grabbing a handful of shirt. In addition to keeping that arm and hand clear of the muzzle, it protects the solar plexus and vital organs, and helps my balance.
So you’ll release the support hand from the gun and “grab shirt” if you’re in two-handed low ready. If you’re drawing from a holster, the support hand should move from wherever it is to the chest as you draw.
shoot from retention
First shot support hand clutching shirt, wrist in contact with side.
Practice the draw
Draw or raise the gun, at the same time disengaging any safety mechanism with your firing hand as your support hand moves to your chest.
Thrust your elbow backward, keeping the grip or your wrist in contact with your side. The firearm will now be at your side, along your ribs.
Look down at the gun. If it’s in front of your body, which is the most common error, push your elbow back farther. Now, tilt the top of your hand outward a bit. Visualize the slide cycling. On its path, will it hit any loose clothing? If so, you’ll only get one shot. Will it catch on the side of a breast or love handle? If so, it’s going to hurt and possibly injure you. Don’t be afraid to tilt the gun outward, no more than 45 degrees.
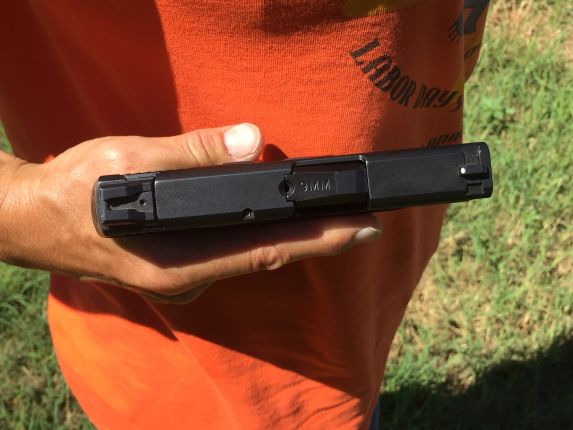
shooting from retention position
Canting the gun away ensures the slide won’t catch on clothes or flesh
NOW is when your finger moves to the trigger.
Having drawn and made sure your outward cant of the firearm is correct, draw a visual line from muzzle to target. Is the round going to land in the desired center mass impact point? If not, change something, usually the angle of your forearm and gun, which will be on the same plane if you have a decent grip.
Look back at the target and press the trigger to “click.” Take your finger off the trigger and rack the slide to reset the trigger between draws to get some sensory feedback of when the first shot breaks.
Go slowly through these steps several times. Speed it up when everything is going right. It’s going well when you go through the entire sequence and then halt, and looking down to see that 1) your trigger finger is already straight and resting on the frame; 2) that the slide would’ve traveled without interference, and 3) the round would likely have landed inside the foul lines. When all three are so, you’re ready to load and fire.
Load and fire
I must reiterate here, people have shot themselves during this exercise by GOING TOO FAST BEFORE HAVING FINGER DISCIPLINE.
Responsibility for safety is always on you, the shooter! If you’ve been admonished by an instructor more than once about keeping your finger off the trigger, that’s a sign you shouldn’t do this exercise without professional assistance. If you’re not willing to take the time to humbly consider your actual use of the of firearm safety rules, that’s a sign you shouldn’t do this drill at all.
Load and fire, using the sequence in the section above. Do one shot at a time, and then fire two shots, rapidly.
Now is when your finger goes OFF the trigger and back to being planted on the frame.
Re-engage any safety or decocking mechanism.
If you’re wearing a holster, reholster slowly. Drawing fast is important. Reholstering fast is bordering on stupid … safety first.
Don’t be surprised if you’re using a gun with a ported barrel and feel a surge of heat. If that happens and you drop the gun in reaction, let it fall. Do not try to catch a falling gun! When I shoot my .40 with a ported barrel, the tilt away from my body prevents any burn, though heat is sometimes felt.
Evaluate
Double check that your finger is straight and on the frame at the end of each shot sequence. Double check that you engage any safety or decocker your gun has after each set of one or two shots. If you missed doing one or both, go back to dry fire for few reps.
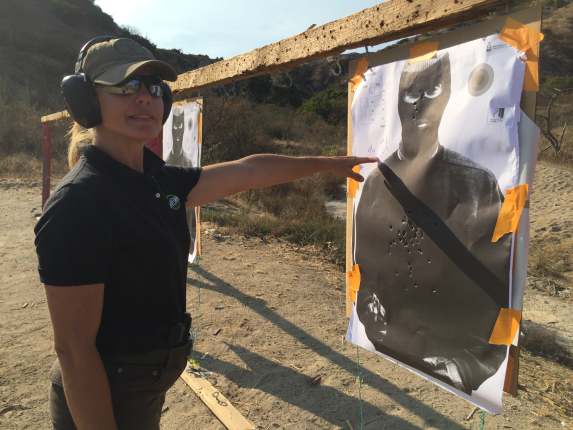
shooting from retention
Second shot. Recoil has moved me back a bit but my gun and support hand are still in position.
Where did your shots land? It can be surprising how easy it is to miss from “spitting distance.”
If you’re a short person shooting a tall target, you may find you need to push the elbow down and back during the draw to stay within the bottom foul line. Understand, some instructors place great value on pelvic region shots. Handgun shots to the pelvic region are generally not terribly damaging, but are said to be very effective in stopping the person’s movement long enough for you to escape. I have no direct experience with this theory.
If shots are landing too far to the gun side, you may be tilting the gun too much, or not keeping your shooting forearm in contact with your side. Do a dry-fire draw and inspect for yourself.
Don’t be surprised when your target backing material is destroyed by this drill. It will happen.
Learning from practice
Done SAFELY, this drill will expand your capabilities for defensive shooting. You may find yourself with a better working knowledge of your gun.
If you try this method according to the guidance above, please post your results in the comments and tell others what you learned. Like our Facebook page, to make sure you don’t miss anything.
http://guncarrier.com/counter-attck-...content-mail-a

 Reply With Quote